Pages

Showing posts with label in the round. Show all posts

Sunday, 8 May 2016

What to knit for your boy

My boy is off at University for most of the year studying (hard???) to become a medical engineer. (Actually I think he is really majoring in drone construction, social dorm living, light partying and online computer gaming).... Boys will be boys...

His university campus is in Victoria's second largest city, Geelong. Geelong is lovely sprawling town on the edge of a bay - the gateway to the famous Surf Coast and the Great Ocean Road - with a country town feel but still all the humming bustle of a big city. There's only one draw back (apart from the up to 5 hour journey by public transport to come home for a visit). It's cold in winter. No, not snow kind of cold, more biting winds straight off the Antarctic.

This gives me a valid excuse to knit all the hats for him. He definitely wears them and appreciates them, both as the edge to an outfit and as a way to keep his ears warm. I love knitting for an appreciative audience - though I may have got a little carried away this year so far.

So it's perhaps not surprising that I began my knitter's year of 2016 by casting on a hat on New Year's Eve and finishing it up on New Year's Day. So I got bored. It’s holidays after all and a I needed a small diversion. That’s what a hat is, isn’t it? I can almost knit one in day.
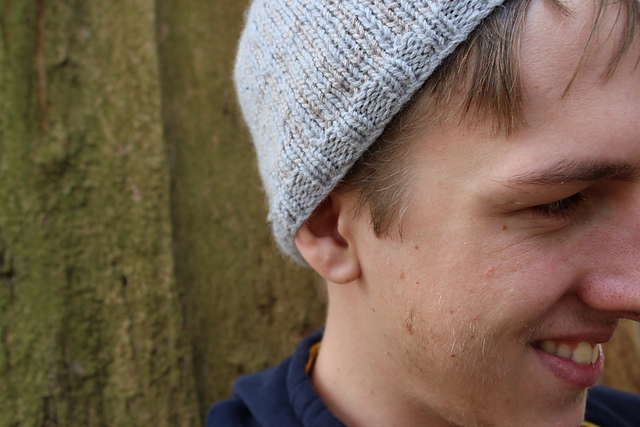
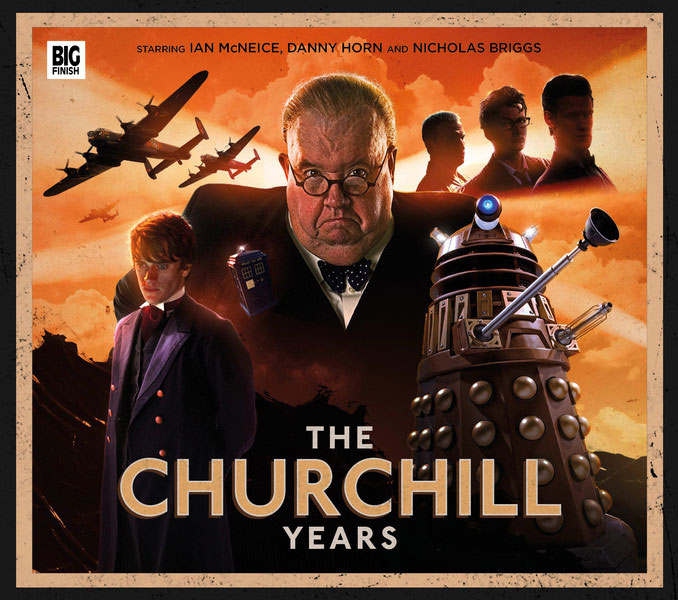
This was a little bit of subtle geekery for the boy (He's a massive Dr Who fan) but it’s a tiny bit of a failure.
Oh, its nothing to do with the knitting or the sizing. It’s lovely even colorwork and fits nicely. (I may just have blocked it by wearing a wet beanie on my head). I just didn’t choose two shades of grey that have enough contrast for the pattern to show up. Also I am using recycled yarn and there are some stains in the yarn on the crown which didn’t wash out… They almost look deliberate though…

This is a really nice pattern (Thanks Amy!). Well written and easy to follow.
Pattern: INSULATE! hat  by Amy van de Laar  - a free pattern.
Needles: My absolute favourite antique Aero jumper length 4mm dpns
Yarn: Blue grey Machinewash 8 ply from the Lifeline Op shop and leftover Bendigo Woollen Mills Stella in Shell.
It's a real pity those Daleks aren't sufficiently visible

I still had the hat bug in my system though. It clearly wasn't going to be a quick fix this time. It was about this stage, I hunted down a hat group on Ravelry and decided 16 hats in 2016 was certainly a doable and admirable goal.

I was feeling some colourwork next.. Anyone who has followed my blog for a while may have noticed the odd fox related thing sneaks onto my needles / hook every so often. Foxes are a sort of obsession of mine. I love how you can evoke a fox with just a stylised shape and colour. This particular pattern has long been in my queue. I swear I didn't actually set out to knit this specifically for the boy, but he begged exceedingly nicely when it was finished...

Pattern: Fox Hat by Eline Oftedal
Needles: 3 mm antique Aero jumper length dpns
Yarn: Cleckheaton Country 8 Ply in a fox-like colour, Moda Vera Pure Wool 8ply in gunmetal grey and Panda Machinewash 8 ply Crepe in cream

This flew off the needles (slowly). It only took a week but the three colour rounds of colour work were tediously slow. I’m slightly meticulous about exactly where to carry the yarn on the back to get the best effect on the front and this means concentration, constant untangling of yarn and slow rounds.

As this is knitted at a very small gauge for DK there were a lot of stitches (144 per round). I am really pleased with the result (But I won’t knit this one again - the colour work would get tedious in quantity). The boy tells me it is soooo warm and snugly.

I photographed this by sneaking into the boy cave, catching the boy in his natural environment in front of a a computer, plonked the hat on his head and told him to ignore me as I randomly photographed the back of his head. In hindsight this may have been the moment I lost this hat to his clutches...

The next hat off my needles for the boy was a re-knit of the INSULATE! hat - Exterminate! 2.0.
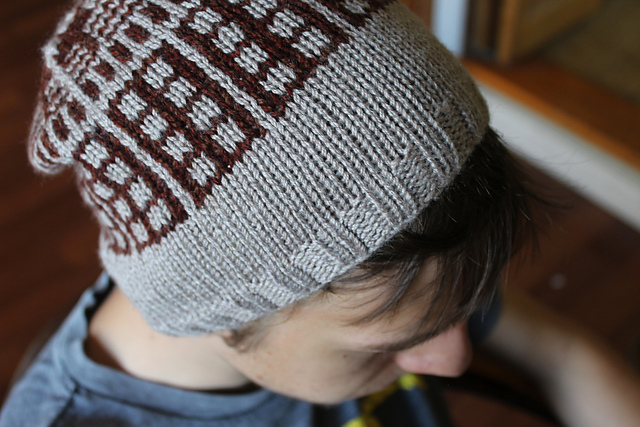
Yes, I know I’ve made one of these already this already this year. But the contrast between the two greys I used is not strong enough to really see the Daleks. And it’s too much of a watch cap fit to please the boy. He likes slouchy beanies. I needed to make another one.

This ended up being the first cast on for Village Hopelessly Over-committed Cast On Month (VHOCCOM12016) on February 1st. I still want to use the Bendigo Woollen Mills Stellar but as the main colour this time. And after running several potential colour combinations past the boy we have tweedy reddish brown Daleks (Slightly rusty - I think these are the old school Daleks that were conspiring against Winston Churchill in World war II - he called them ‘Ironsides’ - ep 3 season 5 - Victory of the Daleks).
I made some modification to the pattern for this version. I did eight rows double rib instead of six as the longer slouch the boy wanted needed a firmer longer band to maintain adequate head connection. I did fifteen rows of plain stockinette in the MC (grey) before starting the colourwork to extend the hat for some slouchiness and changed the shaping from Slip 2 K PSSO to Slip 1 K2tog PSSO.
Pattern: INSULATE! hat  by Amy van de Laar - a free pattern.
Needles: My absolute favourite antique Aero jumper length 4mm dpns
Yarn: Bendigo Woollen Mills Stella 8 ply  in Shell and reddish brown tweed upcycled  from the Lifeline Op shop.
Once again we have photographed the boy wearing a hat in his natural environment - rebuilding a quadcopter drone on my kitchen table after a particularly nasty encounter with the neighbour's fence...

The boy also got the 11th hat off my needles this year as a request. I had previously knitted Father Cables from this yarn (You'll get the see that one in another post). Whilst the boy doesn’t like that particular hat enough to snaffle it - the cables are too elaborate for his taste -  he loves the softness and feel of the yarn. So he wanted something suitably masculine made out of this yarn… He also is the person who pointed me towards this particular yarn in an op shop scrounging expedition orginally so he deserved something made out of it.

We decided on Antler by tincanknits. I’ve had this one printed out for ages now waiting for the just the right occasion. Looks like the marriage of this yarn and pattern was set to be it. So I cast on early in the week and did a few rows of rib and then a few more another day. Then on Saturday whilst manning my stall at a car boot sale (and making a perfectly respectable $8.40 profit after stall cost! - I was selling essentially trash rather than treasure) I finished the rib and worked up about three repeats of the pattern. It was quite a talking point. It still surprises me the reactions you get when you knit in the round on dpns in public. You get elderly people remembering their sock knitting years when everyone knew how to knit a sock and turn a heel. You get bafflement about how do you work with all those extra needles. You get safety admonishments about using all those sharp pointy things and accidentally taking out your own eye whilst cabling…

And then I came home and promptly ripped it all back to the rib. I hadn’t changed needle size from the 4 mm used for the band to 5 mm as the pattern suggested as my 5mm dpns are only 20 cm long and I find them a little short to work with comfortably and stitches like to commit suicide by jumping off the end of the needles. So I tend to avoid them if I can. But I needed to up the needle size to accommodate the pull-in of the cables. So I came home and started the patterning again on 5 mm. By the end of Saturday I was back to five completed repeats. The pattern calls for eight repeats for the small size but I did nine as suggested for the large size as the boy likes a really deep slouch to his hats. This was not promising straight off the needles… Long thin and weird looking. I love what blocking does to this yarn. It makes it bloom and soften till it feels like cashmere. Gorgeous hat in the end.
Pattern: Antler Hat by tincanknits - a free pattern
Needles: 4 mm antique Aero jumper length dpns and 5 mm dpns
Yarn: Cleckheaton Nature Merino 8ply in gray
The boy and I shared a lovely photographic road trip last time he was home around some abandoned refuse from the heavy industry in our area taking photos of this hat. Photo credits for the pictures of the flat hat to @larkinsmark (on instagram).

Thursday, 25 February 2016

Cold Feet in Summer

January 2015 seems to have been a month of odd urges for instant knitting gratification for me. So, when I was cleaning up the massive magazine collection and found these, I knew I had to make slippers in the height of Summer! (Actually really Summer has been a bit of failure this year - a bit heavy on the rain and cool temperatures - not enough sunshine. Slippers in the middle of summer is not really that weird this year).

I have to admit it was partially the colour combination that attracted me to this pattern so I went stash diving for blue and brown. The brown tweed is leftovers from the boy's Graeme Street Slouch and the blue is my last two balls from my pi shawl Smoked Camp pi. They look cool together (more than cool in fact) and are on the thin side for DK so not too hard to work double.
I had a major issue when I got to inserting the waste yarn for the opening for the cuff. It seemed to be in the wrong place. A little voice in my head said, if you put the hole there, it stuffs up how the toe lies. Did I listen to the little voice? Not really! (I never do and always regret it later!) I did check my working from the pattern and was happy I’d followed it correctly. So I did the hat heel (Cool idea that) and completed the cuff and tried the slipper on and it fits and it’s gorgeous and the toe is all screwed up and twisted around and my knitter OCD is engaged big time. I had to frog it (or partially frog it) once I figured out where the stuff up was.

The best way to figure it out? Knit the second one! So I cast on for the tab for the toe, and followed the pattern, increasing around according to the pattern. And then it hit me. I KNEW WHERE I HAD MADE MY MISTAKE on the first slipper. Yes, right at the beginning! I was a silly, over-confident, I’m an experienced knitter and I don’t need to use a stitch marker kind of mistake! In the first knit round without shaping, I’d assumed the yarn tail was the beginning of the round (AND IT WASN’T). So all the shaping from that point was out of alignment and we all know where that little error ended up… So Slipper one got  frogged and reknit…
Slipper two was a walk in the park except for some yarn chicken at the end of the cuff. I ended up with about 1 m of the blue left at the end.

The re-knit of slipper one also went smoothly. (Except I had to use that little bit of blue yarn to complete the heel). The cast off is perhaps a little tight due to a spot of yarn chicken again but I’m really happy with the finished product. This was in fact  a fun enough pattern to knit three times. (No second sock syndrome here!)
Toasting my toes in front of the heater. this is not even a posed shot. It was cold enough to have the heater on.
Pattern: Selfoss Slippers by Rosee Woodland
Needles: 3.25 mm and 4 mm dpns
Yarn: Blue grey wool blend and reddish brown tweed upcycled from op shop.


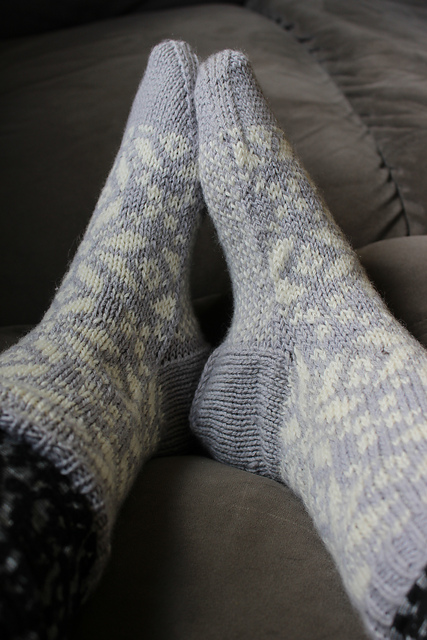
Even after all that I was still feeling some socks but am easing into it by working them at DK weight on big needles. These could also double as slipper socks. This is another pattern that called out to me as I was attempting to tidy, catalogue and potentially cull the magazine collection.... I love Scandinavian type colourwork and the star is such an iconic motif.
These socks had a false start. I did the measuring and dithered between the medium and large sizes. I initially cast on the large size, knitted the band and nearly 30 rows of the colourwork and then tried the leg on. It was WAYYYY too large. (Part of this was probably due to the fact that I was using 3.75mm rather than 3.5mm needles - we don’t have 3.5 mm as a standard size in Australia.). So I frogged it and cast on a medium size instead. This is an addictive colourwork pattern of the" Just one more row" type thing….. (Made redoing the leg again a relatively fun process).

Day one saw the leg colourwork finished. Day two I turned the heel (with tea and breakfast) and finished off the foot (31 rows of colourwork) and the toe. The heel shaping is somewhat different to the Dutch heel I’m used to but fits nicely. The pattern called for decreasing down to eight stitches for the toe and running a gathering thread through similar to fastening off a hat. I decreased down to the eight stitches as suggested but used Kitchener stitch instead (Once I found some instructions to refresh my memory on the sequence). This is tidier but these socks still suffer from pointy toe syndrome.

These are quite a good fit on me. The leg deals nicely with my solid calves and puffy ankle. (Why is it when you are recovering from a damaged ankle, you twist it again just as it is nearly better?) So two days = 1 sock…

I decided I'd better cast on sock two straight away… (Avoid second sock syndrome at all cost). Second socks are always better. You’ve ironed the kinks out on the first one. The only hiccup on the second sock was running out of the cream yarn and having to stash dive scraps to finish the sock.
Pattern: Nordic Star by Eline Oftedal
Needles: 3.75 mm dpns
Yarn:  Panda machinewash 8 ply crepe in cream and blue grey machinewash upcycled from the op shop.

Sunday, 10 May 2015

Smoked camp pi

You may have realised in my day job I'm a mild mannered semi-nerdy mathematician/ statistician. Yes, I have the glasses and calculator collection and academic university day job to prove it. It means that I get somewhat excited about some things that the rest of the world thinks are slightly weird. Take Pi day (14th March) for example. This year was a very special Pi day. A once in 100 years Pi day. We had the first 5 digits of pi as the date (American style dates of course). Cue an amazing Pi party.

I got invited to the the most amazing online Pi Party in existence with over 100 types of virtual pie and knitting goodness galore hosted by the amazing PJ. Luckily it was a Saturday so all day my inner nerd was eating as much virtual pie as I liked (there was pizza pie, apple pie, lemon meringue pie, cheesecake.... and all calorie / kilojoule free and no crumbs in the knitting). And all the while I was singing internally "It’s pi day. It’s pi day. You’ve got to cast on on pi day…."

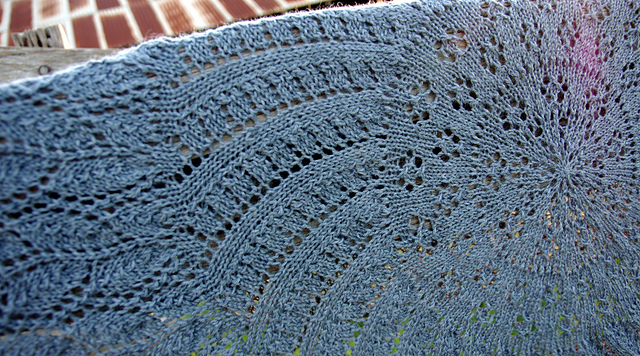
(What for, a pi shawl of course). I wanted to make a lacy pi and settled on the 100 anniversary pi shawl design - Camping. I’m a sucker for lace leaves and it has a beautiful scalloped border. I made this fairly large and at large gauge so it can double as a pi blanket.

I began with Emily Ocker’s circular cast on using a crochet hook. This is so cool. I always love when I get to learn an awesomely practical new technique and this so neat and useful for my future knitting.
I used the first 12 rounds of the Heliotaxis pi shawl pattern (up to the 72 st increase round) as the beginning of my shawl. I did however chase up a copy of the 100th Anniversary edition of Elizabeth Zimmerman’s Knitter’s Almanac to look at how the original beginning went. I devoured the July chapter - a shawl …

Have you seen the well known geometric theory behind what you have been doing? …. It’s Pi, the geometry of a circle hinging on the mysterious relationship of the circumference of a circle to it’s radius. A circle will double its circumference in infinitely themselves - doubling distances” (Zimmerman, Knitters Almanac). I do have to take issue with EZ about her comment about women forgetting such mathematical theory the minute we finish high school in order to fit in more practical knowledge. Clearly that’s not the case for all such women. Who says Pi is not practical anyway? It after all is applicable to knitting! (Plus I get to teach the awesome usefulness of pi to science students).
Drive by pi
I worked on dpns until I had enough stitches to transfer over to a 80 cm long circular.
This was awesomely addictive knitting - along the lines of just one row more…. Because the patterns were relatively short repeats, the lace was quick and simple to execute. It didn’t lose it’s charm even when the rows were 592 stitches long (or nearly 900 in the last row!) It only took about three weeks to knit too - very quick for nearly a jumper’s worth of wool.

I have to agree with EZ that a circular shawl is perfect travel knitting. The knitting creates its own bag shape as it grows and you can store the yarn inside it. You can knit on public transport without losing the ball under seats. It scrunches up small enough to transport easily even when close to the end.
It blocked out huge - 52 inches or around 134 cm in diameter. We decided this is about the largest circular shawl I can actually practically block. It took nearly the whole alphabet - 25 of my 26 alphabet jigsaw blocking mats (and most of the lounge room floor).

This may be my first pi shawl but it won’t be my last one. This is coming to my next maths conference so it can hang out with the other mathematicians who truly appreciated the blend of geometry, maths and gorgeous lace this is.

Pattern: EZ 100th Aniversary Pi shawl: Camping  by Mwaa Knit Obsession incorporating the middle of Heliotaxis Pi Shawl by Nata's Knots - both are free patterns.
Yarn: Blue grey wool blend? Recycled yarn bought from Lifeline op shop - thin 8ply weight.
Cost: $5 for a jumper lot. I have 2 balls left over
Needles:  4.5mm (dpns and an 80cm and 100 cm circular)

Saturday, 28 March 2015

I do still love you blog...

I hate it when I come in here and have to push my way through the massive spiderweb someone's built blocking the doorway. (Where did that come from? I'm sure I've never knit any spiders). Pardon me while I spit out some spiderwebs and brush them out of my hair and off my glasses. There may well be some dust bunnies breeding in the dark corners too but I get that. Bunnies do breed like bunnies and I've certainly knit enough of them over the years to have a substantial breeding colony of the things.

It looks like I may have been neglecting my little corner of cyberspace just a little. A tiny, incy weeny tad (or something). Let's just get a broom and a mop and bucket and clean up a little in here, why don't we? There, all neatly spick and span again.

Now, I really did come in here to show you things. (Actually I got pushed in...) I have been creating lots and lots and lots. I have one, no two, three, four (and possibly some more) new knitted finished objects to share with you. I've been so busy knitting and crocheting away (and working flat out, but let's not mention that) that I've forgot to give each happy little knitted object a chance to recount its journey and shine. They may have got a little bolshi on me demanding little creatures. So here I am to do their bidding.

Remember how back on New Year's Day my daughter and I dyed some beautiful yarn? With food colouring and tea and coffee and microwave?
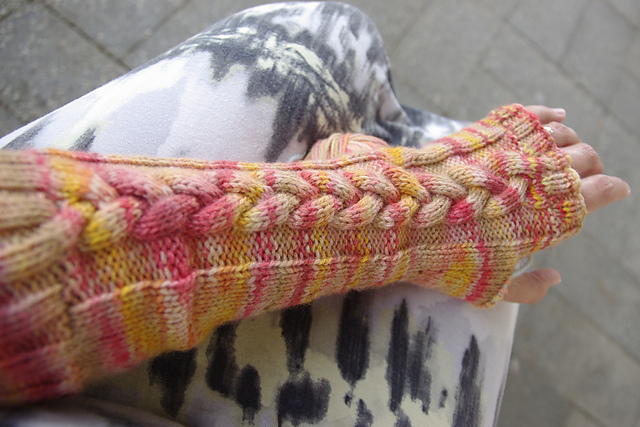
She commissioned some elbow length cabled gauntlets. She settled on Lady Jane Grey's Gloves by Sarah Lady. These are elbow length with a plaited cable on the the top and shaped to fit the arm.

These were one of my first projects for February COM (Cast on Month). The idea is to cast on something new for every day of the month of February. I didn't quite make it but it was an awesome ride along the way. The first glove wasn’t exactly smooth sailing. I had to use 3.75 mm rather 3.5 mm as suggested in the pattern. (3.5 mm is not a standard size in Australia). The I misinterpreted the instructions for the placement of the thumb gusset and got to the top of the gusset before realizing I had to frog back about 18 rows and move it over to where the thumb is actually anatomically situated on the hand. I successfully completed to top of glove but then frogged back and re-knit the edging on 3.25 mm needles to make it fit tightly enough around Mel’s palm.
This is a free pattern and not for the faint-hearted novice. It is a little primitive in its writing style only detailing the cable section and describing where to place it. It requires some intuitive decisions that only come from years of experience. (That said, it is a lovely design).

I love how the colours spiral around this. It makes me happy just to look at it.
 The second mitt took only two days with no fuss and drama attached! I need to dye more yarn! it’s eleventy times more fun to knit with your own hand dyed yarn!
Pattern: Lady Jane Grey's Gloves by Sarah Lady
Needles: 3.25 and 3.75mm dpns
Yarn: Hand dyed aran weight machinewash wool.

The children staged a photo shoot for this in a local cafe complete with decadent iced coffee / chocolate beverage. Mel created a personalized unique manicure to highlight her gloves. (Some of my North American virtual knitting friends suggested that these are just the ultimate cosy mitts for winter coffee runs. The kids did the best to recreate this scenario in the middle of an Australian summer).

Saturday, 27 December 2014

We knit you a Merry Christmas....

In December, the knitting needles tend to naturally turn to knitting ornaments. Even almost without conscious effort, I find myself wanting to knit little whimsies for my Christmas tree and to share with my family.

I spent the first week of December on the beautiful Australian Gold Coast having a much needed relaxing holiday. Sun, sand, surf, shopping, neon, amazing food and seven and a half thousand cheerleaders. (One of the main reasons we were there was to watch future doctor daughter shake her poms in the Open Australian title division as a prelude to Worlds next year #20swifteen).

Holidays mean holiday knitting, right? It's the best way to wind down and de-stress. If you are a knitter, you understand that the most agonizing part of holiday packing is deciding just what knitting to take with you on holidays. You've got to have enough for all your knitting moods. You need extra yarn, just in case you run out. You've got to remember to pack all the appropriate needles and stitch markers, scissors, sewing needles, the pattern, etc... You need more than one backup project in case it all goes wrong for you.

Holiday knitting also has to be portable. This time around, I decided to take two small knitting kits that had come with various English knitting magazines. Part of the impetus for this was knitting for Christmas with the delightful ladies in The Unofficial Women’s Weekly group who were running a CAL/KAL for November/December 2014

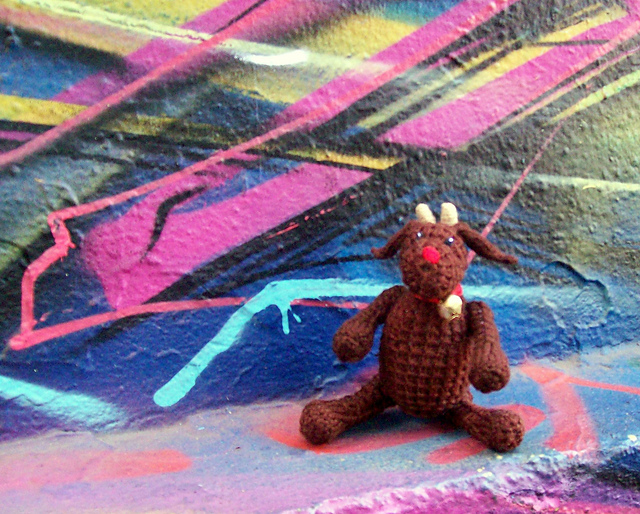
This first was a cute little reindeer kit that came with issue 105 of Knit Today. Supposedly everything needed, yarn, stuffing, embroidery thread, ribbon and the bell - just add needles. I love his little slip stitch texture. And he’s cute and small and Christmassy.

And then I ran out of yarn (and stuffing) not even a few days into the holiday! I knitted and stuffed two legs complete with their little separate hooves. I made the body and stuffed it with what I had left of the stuffing supplied in the kit but it’s not plump enough. I knitted the head and sewed up the ends. I made a tail…. and I had about 25 cm of yarn left….
 I don’t know what the issue is. I used the suggested needle size (2.75 mm). My tension checks out OKish… There’s just not enough yarn in the kit. I still had to make two arms and the hooves, two ears and two antlers. I’m pretty sure I have some similar brown acrylic in the stash. So I'll finish it when I got home. So much for this being holiday knitting. (That's why you take backup projects...)

Actually the brown acrylic, I was thinking of was in my mother’ stash. She has custody of all the cheap toy acrylic. She was happy to see me even if I was only there to steal wool…. I knitted the arms and paws and stuffed them. The colour is quite different but it looks OK after assembly. (It’s sufficiently symmetric). I knitted two ears and embroidered the face and tied on his bell. Voila!
The kids were quite uncomplimentary about the finished object - they decided it doesn’t look like a reindeer. They were calling it a dog / cow / minotaur thingy. (Minotaur? - too much fantasy reading going on around here).
Photos taken in Hosier Lane in Melbourne during the mad Christmas rush season. I love good graffiti laneways.
So it was onto the backup knitting plan. I turned to the other kit - a Christmas angel that was again a kit from Let's Knit Issue 73, November 2013. The pattern is called Gabriella by Amanda Berry. This one was knitted on 3.75mm needles. it's knitted flat and then seamed. I knitted the head and body bit. Then the holiday finished.
I knitted little bits of the angel here and there over the rest of December but had a small spot of procrastination in finishing up the face and the hair. Finally knuckled down and did it early in the morning on the 23rd of December. This one is part of my Mum's Christmas gift. I've been told the angel has a serene expression. I love the pop of gold in her hair and wings.
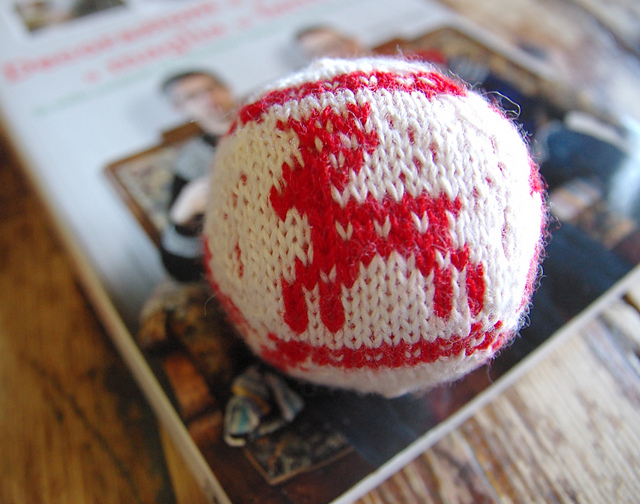
Last Christmas was the first year, we were missing a child for Christmas dinner. The middle daughter spent her Christmas in Padova in Italy with generous friends chasing the elusive white Christmas. It didn't snow for her but it was still an awesome experience. She bought me home Italian knitting magazines and a copy of Arne and Carlo's Knitted Christmas balls book (in Italian). Now I can read Italian (sort of). I studied it a high school but it is very rusty. However, once I brushed up on the Italian knitting terminology, I was fine with this. There are clear photo tutorials for stuffing and finishing and all the patterns are charted. Mel of course had an ulterior motive in buying me this book. She wants a collection of red and white baubles for her future tree. Of course I'll oblige. She keeps complaining about a distinct lack of Christmas markets in Australia.
I made a sample bauble using DK and 3.75mm Needles. It was an abject failure as a bauble. It was miles too large and there was insufficient contrast between the yarns I was using. (Probably a mistake to use a variegated yarn as one of them. It does, however, make a good cat toy / child's ball though). So we went to fingering weight yarn and 2.75 mm needles. Meet Running reindeer. Next I'm going to knit the Christmas goat. (See Gavlebokken).
And I made a gift tag for my sister's present. These little owls are a great effective use of tiny little scrappy bits of yarn. I did have a plan to make a heap of these for present tags. It didn't happen. Life intervened. But at least one present got special love.

Saturday, 22 November 2014

Mould is fun!

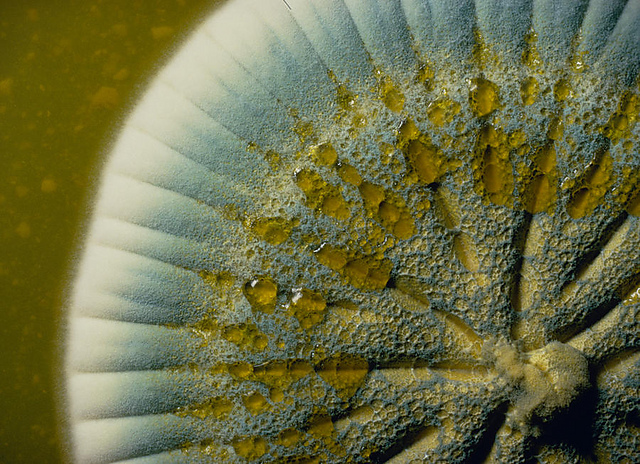
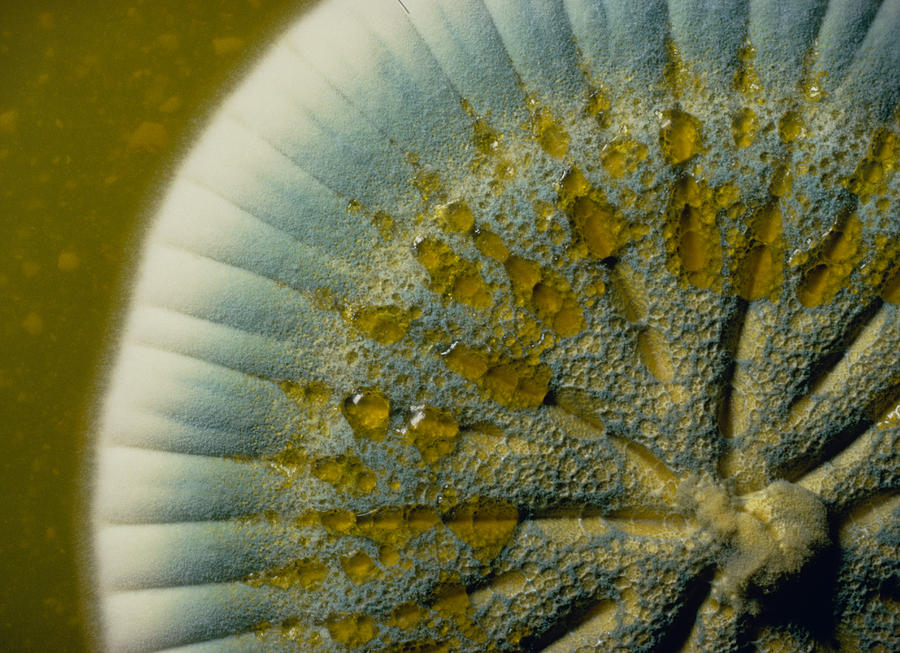
I blame it all on my middle daughter Mel and this photo (and of course the enablers who are the IFFF (International Freeform Forum on Ravelry). Mel is a recently graduated environmental microbiologist with an enduring scientific passion for fungi. She’s now on the long academic journey to becoming a mycologist – a fungi scientist. It’s because of her that I know that mould is essentially just microscopic fungi. When the lovely Loren in IFFF instigated a Fungus Along for October / November and put a call out for DFADs (Designers for a Day), I knew what I wanted to do. I wanted to try to write my first patterns and I wanted to do mould.
As part of a project, Mel collected and cultured mould spores collected from the air in houses on petrie dishes. It’s been a long term dream to turn this photo into a knitted cushion for her. Probably a little ambitious for a DFAD gig though. So I concentrated on just one species of mould. See the little blue green colony here? That’s Penicillium – the source of the antibiotic penicillin. (And here I apologise for the Australian spelling – American spelling is mold, Australian spelling is mould).

There are two species names used for the penicillium mould that penicillin the antibiotic is extracted from – Penicillium notatum is the original scientific name but more recently scientists refer to it as Penicillium chyrsogenum. To see penicillium mould’s afinity with mushroom have a look at some pictures of it under a microscope – it’s like a beautiful delicate fringe like flower. But we’re going to make amazing mould colonies.

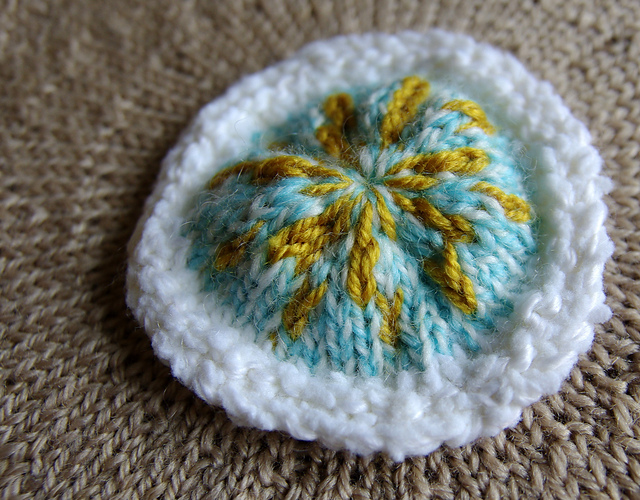
I made patterns for four penicillium moulds - two knitted flat and two crochet. Here are the pictures of the finished moulds. Firstly the inspiration photos and then the knitted / crocheted versions.

Penicillium notatum

This one is knitted flat using short row shaping to make a circle with a random crochet edge.

Penicillium chrysogenum
(It’s when the mould colonies start to produce spores that they become really amazing – producing bright jewel-like beads of colour).

This one is also knitted flat on two needles. I was aiming for actual wrinkles in the knitted surface with this one and a slightly dome like circle with a flattish edge. (I used acrylic yarn but I suspect you might get crisper wrinkles using something with a lot of cotton in it). The edge yarn does need to be a heavier gauge than the center yarns or the edge will curl up.

Mould colonies
I'm not going to show you the inspiration shot for this one as it is a stock photo and sharing it on my blog would be abusing copyright. Mould grows in circular colonies that clump together with rounded edges. This is my first go at designing a crochet pattern and I admit I was really apprehensive about whether people could follow it. But there are three lovely mould colonies made from this pattern in the IFFF group as I write this and they are all beautiful in their own way.
This could also be a contour map?

Bonus Penicillium Mould
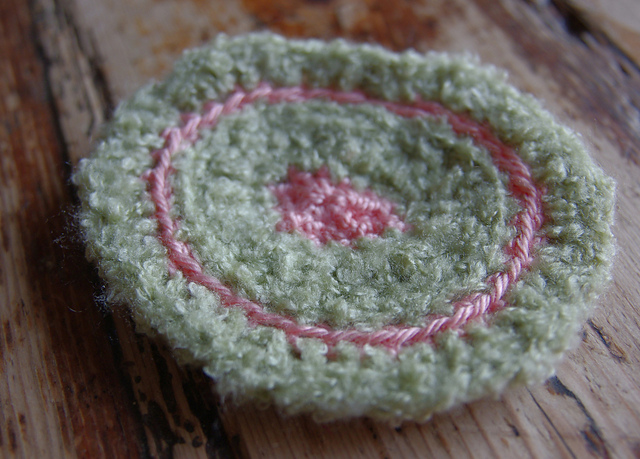
What do you get when you combine a fuzzy green yarn from the 1980s and a collection of beads? Embellished mould. This was just such a gorgeous inspiration picture I had to try to capture it in yarn.
Mould before beading
So my house is filled with mould - and it's not a sign of slack housekeeping.... (Though that is also one of my skills - after all, I'm a knitter!)